You’ve chosen wisely (in my humble opinion, at least)! This guide will walk you through the simple process of setting up a development container using VSCode and Docker.
Install VSCode
First, you need to have VSCode installed, which can be done here.
Install Docker
Next, you must have Docker installed. If you have not already done so, please follow the instructions at Installing Docker.
Download the Remote Development Extension Pack
It is highly likely that you have already downloaded this extension pack at some point. This extension pack includes Microsoft’s set of extensions for enabling using VSCode with remote hosts. Included are the following extensions:
- Dev Containers - What we will be using. This allows you to connect to and create Docker containers and run VSCode as if it were inside the container. It also allows you to use configuration files inside a directory to automatically initialize a dev container with additional features and post-build scripts.
- Remote - SSH - Allows you to run VSCode on an SSH connection. For example, you could use this to modify code files in a remote server, using VSCode on your laptop. This doesn’t have the ability to set up a “all batteries included” container for your project like Dev Containers, but is useful on its own. Note: DO NOT run this on Isengard. This has caused issues in the past.
- WSL - Similar to the SSH extension, except for Windows Subsystem for Linux.
- Remote - Tunnels - Worth exploration on it’s own, similar to SSH, except it doesn’t need an open port accessible from the web. You simply need to enable tunnels in VSCode on a device you want to tunnel into, sign into GitHub on both the accessed and the accessing machine’s VSCode, and you are able to access the device from anywhere without port forwarding or SSH.
Create the Dev Container Configuration File
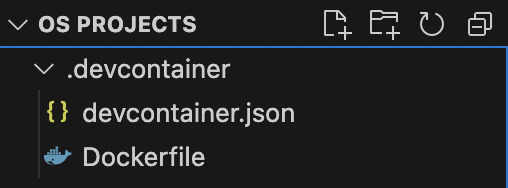
Inside your OS project directory (we recommend you to use OS_Projects, but you can name it whatever), we need to create the necessary directory structure. Download the container_conf.zip file, and unzip it into your project directory. Note that all files that start with a ”.” are hidden by default on most operating systems and file managers. VSCode generally does not hide dotfiles, though. The .devcontainer folder from the zip, which contains the devcontainer.json and Dockerfile files, should be inside the root of your projects directory.
This is an example of what the directory looks like for our VSCode editing this documentation repository:

Your project directory (OS_Projects) should have the .devcontainer directory at the root.
Pedal to the Metal, Let’s Start Operating Some Systems!
Whenever you open up your project directory, a VSCode dialogue should show up asking you if you would like to open the directory in a container. Click Reopen in Container. For the first time, it may take a minute to build the container, but subsequent opens should be much faster.

One time GitHub key setup - Must be done within the container
- Follow GitHub’s guide for setting up SSH keys, make sure to use the Linux tab. Follow the sections under “Generating a new SSH key” and “Adding your SSH key to the ssh-agent”.
- Make sure to follow the guide for adding a new SSH key to your GitHub account if you haven’t already.
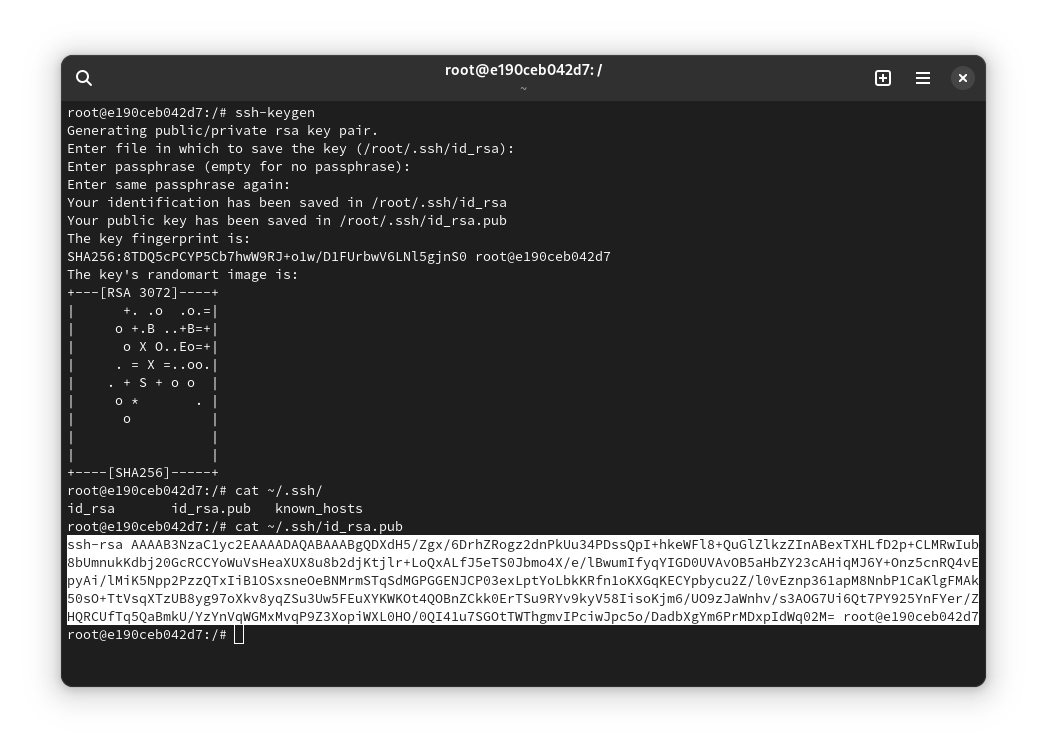
- Note: to print your public key (note: do not print or copy your private key… EVER!), you can run:
cat ~/.ssh/id_rsa.pub; - For example (throwaway, good luck using this key for anything).

- Note: to print your public key (note: do not print or copy your private key… EVER!), you can run:
Per-project Setup
- Create a github project instance by clicking on the github classroom invitation in the canvas assignment
- Clone project starter files into your container
$ cd /root/projects; git clone git@github.com:CSCI-442-Mines/f24-project-1-<username>.git
Developing your code
- After cloning the project, your project files will be under
/root/projects/f24-project-1-<username>.git. - Compile your code by running
$ make. - Run the binary that is specific to the project (for project 1 it is
./reverse). - Implement the project via your favorite editor.
- At the end of any programming session, or whenever you make any progress you want to save (feature complete, partially implemented, or you just don’t want to lose work), run
git commit -a && git pushin order to save your changes to you git repository.- We STRONGLY recommend doing this frequently, so you do not lose your work.
- It happens every semester where someone forgets to commit some major work and loses several hours of work, you don’t want to be that person.
- Take your screenshot to upload to deliverable 1 once the D1 requirements are complete.